


Background:
In early September, we published a piece detailing our SMB / SOHO NAS (Small & Medium Business / Small Office Home Office Network Attached Storage) testbed. Subsequently, we received extensive feedback from readers regarding the testbed as well as the proposed testing methodology. The universal consensus was that the VM (virtual machine) density could be increased (given the dual Xeon processors and the minimal load on the CPU from the workload). Readers also helpfully pointed out traces that could potentially replicate NAS usage in typical home scenarios.
We had carefully planned the infrastructure necessary for the testbed to ensure that the system wouldn't suffer bottlenecks while generating traffic for the NAS under test. However, we hadn't explicitly planned for increasing the VM density from 1 VM per CPU core / 1 physical disk per VM / 1 physical GbE port per VM. After doing a profiling of the Iometer workload, we discovered that there would be no issues with increasing the VM density.
Balancing the Network Requirements:
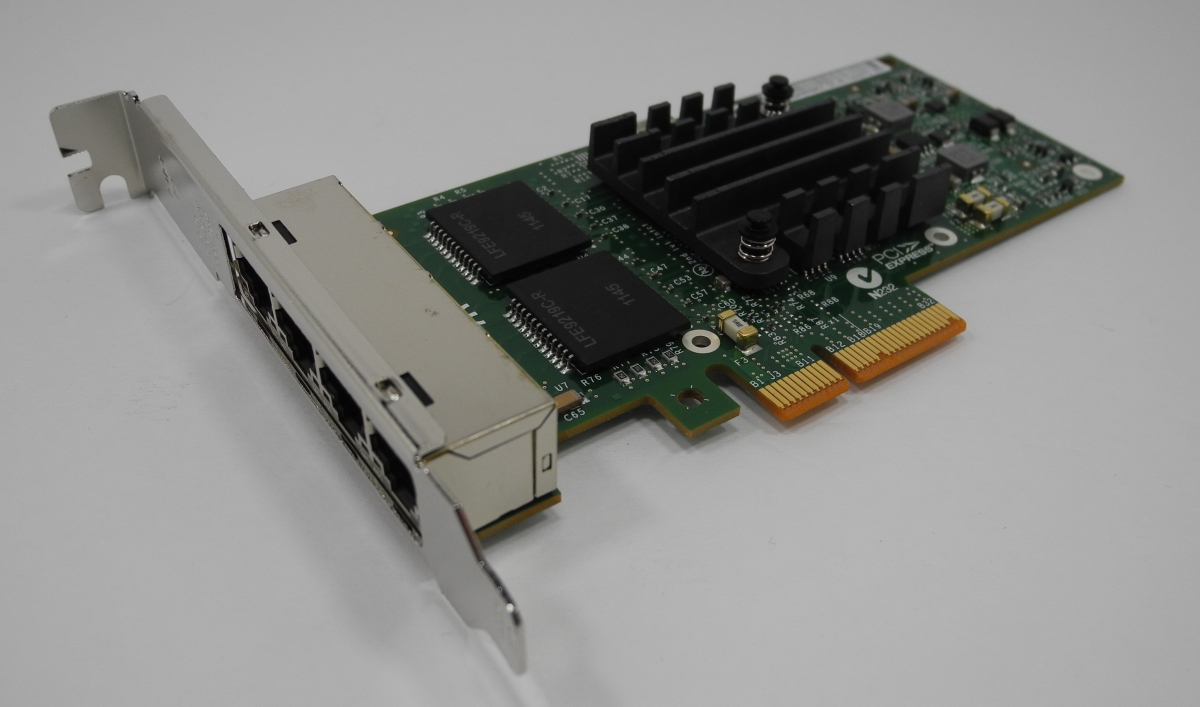
Given the purpose of the testbed, it was impossible to give up on the requirement that a physical GbE port be tied to each VM. If the VM density were to increase, it would become imperative to add more GbE ports to the testbed. Fortunately, Intel had supplied us with twelve ESA I-340 T4 units in the initial stages itself.
The Storage Challenge:
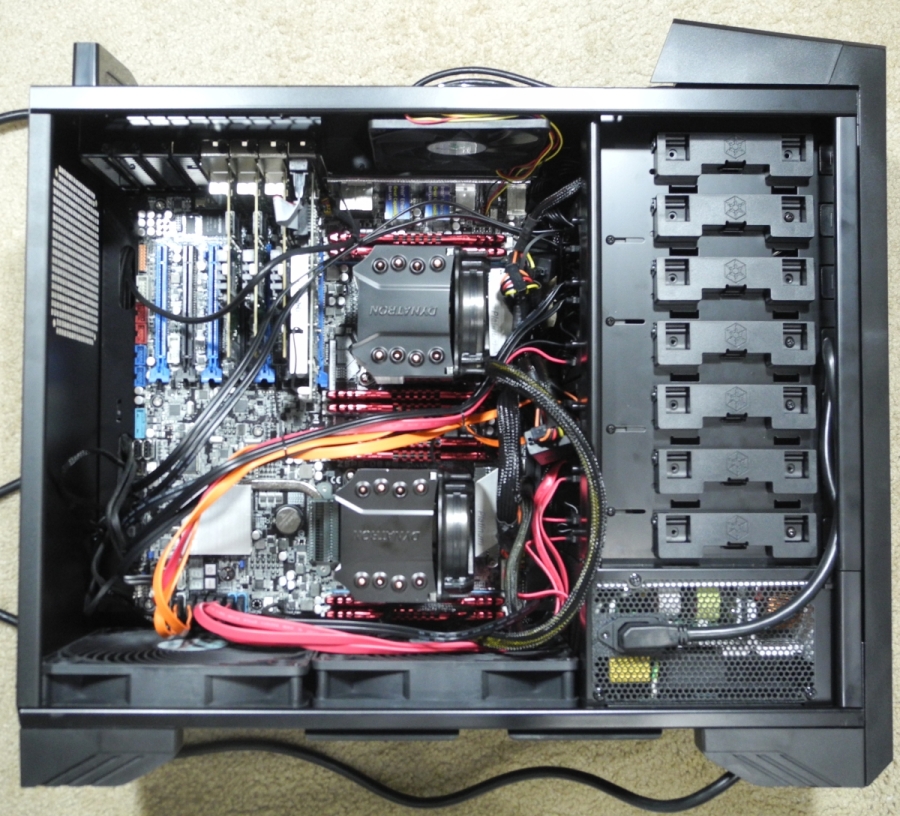
Our primary challenge lay in the fact that we could no longer afford to dedicate a physical disk to each VM. To compound matters further, all the SATA ports were occupied. In hindsight, it was not a very good decision to attach a 64 GB SSD fully to each VM. While it was possible to store two VHD files corresponding to the boot disks of two VMs in each of the SSDs, we didn't opt to go that route for two reasons. The occupied disk space for each VM was quite close to half the SSD capacity when the OS and the associated benchmarking programs were added up. We also didn't want to go through the whole process of setting up the existing VMs all over again. It would have been nice to have 128 GB or 256 GB SSDs connected to each SATA port and not gone with the dedicated physical disk in the first place. For the update, we needed more storage, but there were no SATA ports available. The solution was to use some sort of PCIe based HBA / storage device.
In order to achieve fast turn around, we decided to image one of the twelve 64 GB SSDs into a VHD file and use copies of it for the new VM. This meant that each VHD file was close to 64 GB in size. While the expansion of the networking capabilities made the testbed capable of hosting up to 25 VMs, we had to add at least 13 x 64 GB (832 GB) over the PCIe slot to make it possible. One solution would have been to add a SATA - PCIe bridge adapter and add a SATA drive to the system. However, all the accessible SATA slots in the chassis had already been taken up. All the storage had to be restricted to the space over the PCIe slot. We could have gone in for a high capacity PCIe SSD, but cost considerations meant that we had to drop the idea. A solution presented itself in the form of the OCZ RevoDrive Hybrid.
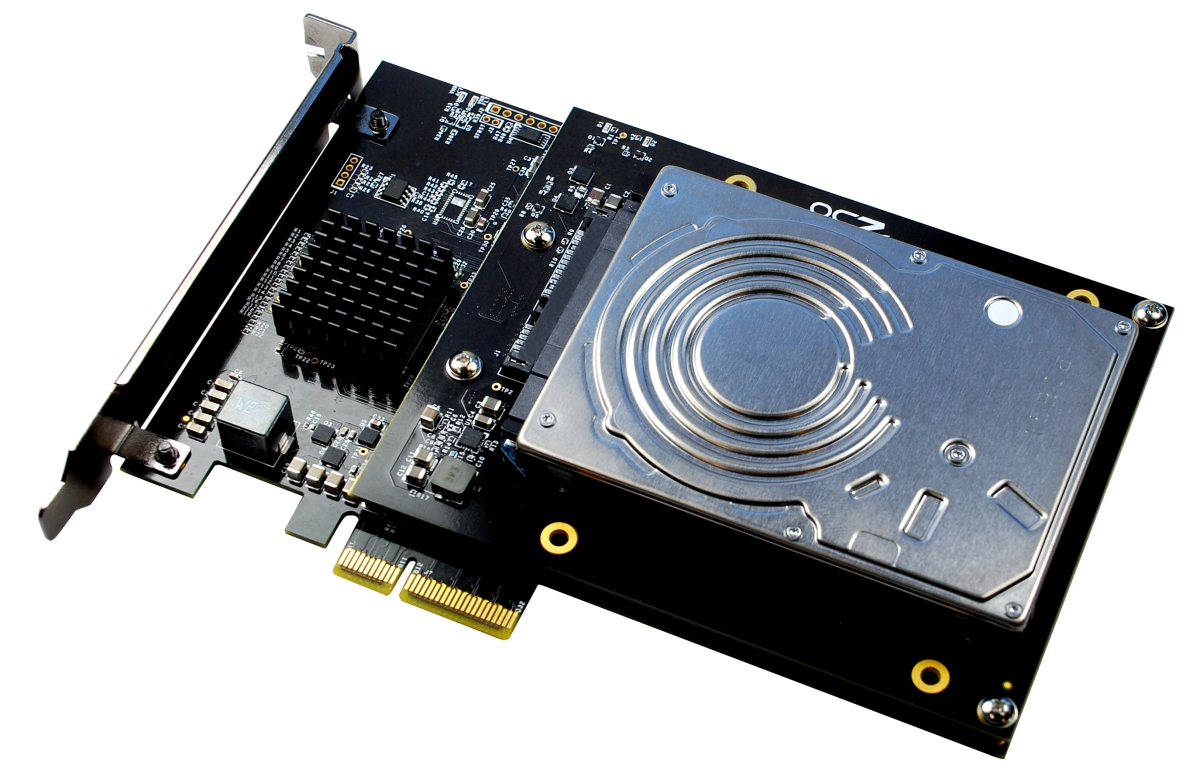
We took some risks and installed the RevoDrive Hybrid in the sole remaining PCIe slot. A driver was available only for Windows 7, but it installed without issue on Windows Server 2008 R2. Under Disk Management, the unit appeared as two drives, a 93 GB SSD and a 931 GB HDD. We made 13 VHD copies of one of the 64 GB physical disks on the HDD and set up 13 new VMs with configurations similar to the existing VMs. A physical GbE port was dedicated to each VM and another network port was created to connect to the internal network of the workstation (with the host OS acting as the DHCP server). The only difference compared to the existing VMs was that a VHD file had to be attached to the internal disk of the VM instead of a 64 GB physical disk.
Performance Considerations:
The update to the internals of the workstation went without a hitch and we were able to get 25 VMs running without any major issues. Obviously, booting up and shutting down VMs 13 through 25 (VHD files on the PCIe HDD) simultaneously took more time than we would have liked. However, once the VMs had booted up, access over SSH and running programs that didn't stress the disk subsystem of the VM were smooth. Our benchmarking script (running the Dynamo traffic generator on each VM with the IOMeter instance in the host OS) was also trivial to update and executed without any hiccups.
Moving forward, we will be stressing NAS systems by accessing it simultaneously from up to 25 VMs, which is representative of an average sized SMB setup. For any benchmarks which might stress the internal disk subsystem, we will continue with the 12 VMs on the dedicated SSDs.
Updating the Testbed - External Infrastructure
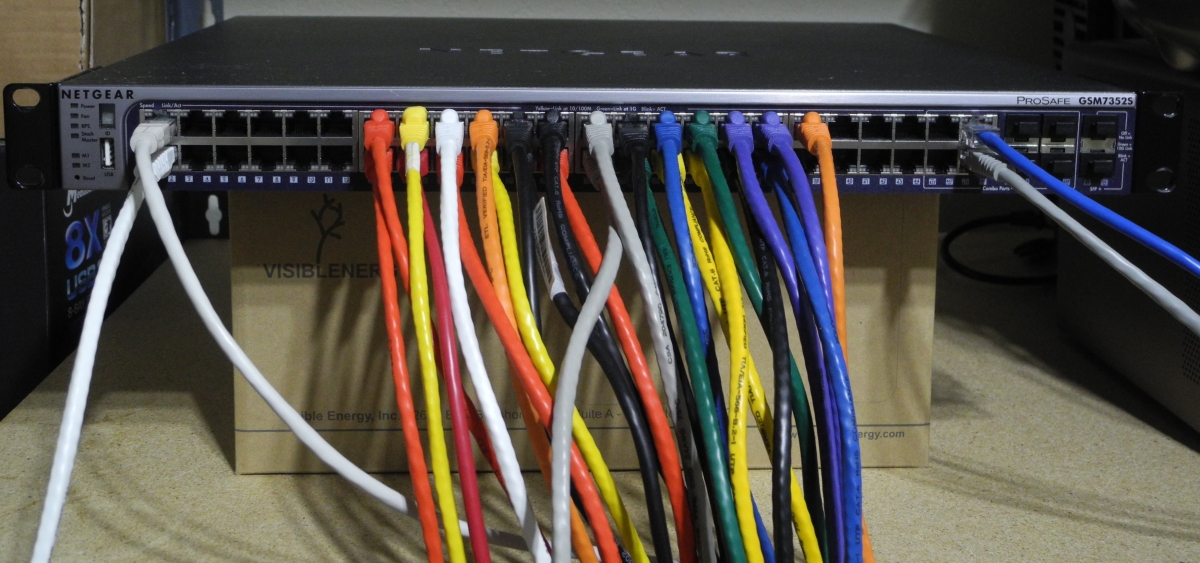
Between the set up of the original testbed and the beginning of the update process, some NAS vendors also approached us to evaluate rackmount units with 10 GbE capability. This meant that the ZyXel GS2200-24 switch that we had been using in our testbed would no longer pass muster. Netgear graciously accepted our request to participate in the testbed upgrade process by providing the ProSafe GSM7352S-200, a 48-port Gigabit L3 managed switch with built-in 10 GbE.

The first port of the Netgear ProSafe GSM7352S was connected to the ZyXel switch and acts as the management port. The switch acts as a DHCP client and gets a management IP address from the Buffalo router. We configured ports 1 through 12 to remain as part of the default VLAN. Clients connected to these ports obtain their IP addresses (of the form 192.168.1.x) via relay from the main router. Ports 13 through 50 were made members of a second VLAN and a DHCP server issuing addresses of the form 192.168.2.x was associated with this VLAN. No routes were set up between the 192.168.1.x and 192.168.2.x subnets.
All the VMs and the NAS itself are under the same subnet and can talk to each other while being isolated from the external network. Since the host OS also has an internal network for management (each VM is connected to the internal network in the 10.0.0.x subnet and also to the switch in the 192.168.2.x subnet), we were able to run all the benchmarks within the isolated network from the Remote Desktop session in the host OS.

No comments:
Post a Comment