Final Product What You'll Be Creating
When
working on a matte painting in a production environment, you will
likely be provided with either a 3D render or a photo to use as a base
for your artwork. In this
Tuts+ Premium
tutorial, Ed Lopez will combine photo manipulation with digital
painting to create a misty landscape in Photoshop. This tutorial
includes both written and video content and is available exclusively to
Tuts+ Premium Members. If you are looking to take your matte painting
skills to the next level then
Log in or
Join Now to get started!
Tutorial Assets
The following assets were used during the production of this tutorial.
Step 1 – New sky and sketch
So here we go; for the base image I will provide you with a base
render I made for you guys specifically for this tut. In a production
environment for matte painting, 99% of the time you will be provided
with either a 3d base or an image from the production to work with, at
least you get a storyboard or sketch to start. Go ahead an open up the
bas image here.
First thing we need its a new layer where we can start sketching out our plan for the image.
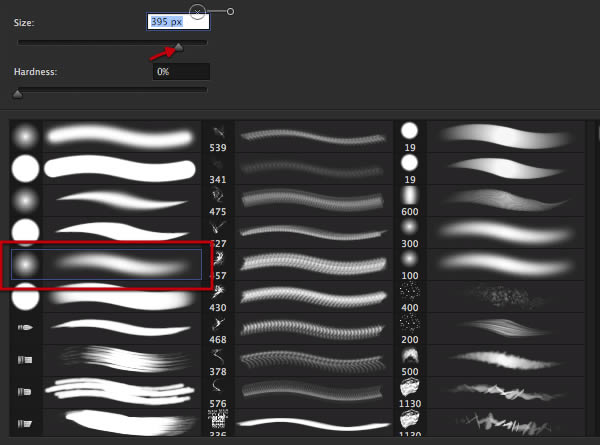
Now let’s pick up this chalk brush here; we will be using this one quite a bit.
Other thing we will be doing all the time its sampling color from the
base next to the different sections we will be painting on.
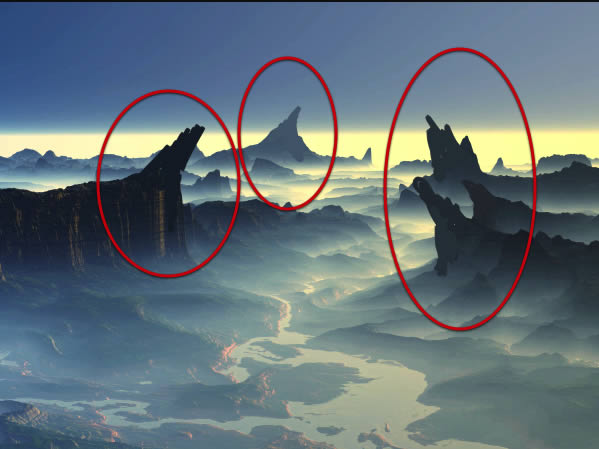
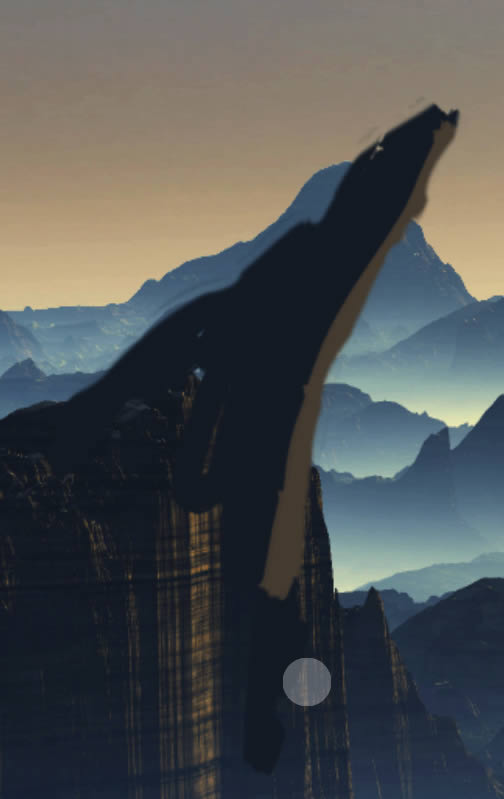
We quickly sketch out some nice overhang peaks, and when we move
further back in z space we sample color accordingly from the plane in
which we will paint. We are just painting quick shapes, we are more
interested in the overall look and positioning of the shapes; avoid
getting into any detail, and keep in mind only the overall image. We
need to train our eye and get something that pleases our vision. Don’t
worry if you paint something that doesn’t look good just remove it and
paint somewhere else.
You can see here how we are building up shapes on to the horizon, it
also doesn’t matter if you paint yours in different positions, or maybe
even different shapes, we must be creative. Also you can see as
mentioned earlier that its only very rough shapes, while you paint, zoom
out and look at the overall image constantly to see how the composition
feels.
Once we have the rough shapes in place we sample highlight color to
start planning on where these highlights need to be positioned according
to the light source.
In the same way just paint in some rough highlights as shown here,
that quickly give us the light direction and feel from our light source.
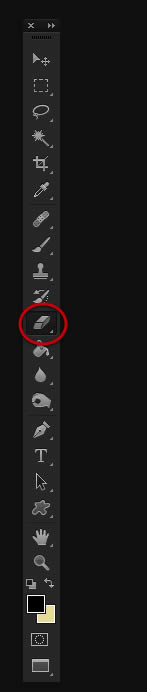
Once we are satisfied with what we have, let’s grab the eraser tool with the same brush.
With our eraser tool let’s just polish the edges of our painted peak
shapes just a bit, and check our scene and decide if we want more peaks
or maybe even remove some.
Once we are all set with the initial sketch, let’s grab the magic wand tool.
On the base plate let’s use it to select the whole sky, which wont be
a problem since it is mostly well defined. This is a basic on matte
painting, you will be asked to replace skies all day.
If you have some section where the magic wand spills off such as this
one, just use your lasso tool to remove that section from the
selection.
Once you have a good selection of the sky, just inverse the
selection, and click on the mask icon which will give you and instant
mask of what we selected. This is a non destructive way in which I like
to work, where you can edit the mask if something is not correct, and
also so you can easily detail the mask as you need. Take a bit of time
and check if there is any left over from the sky that needs to be
removed.
Once you have detailed the mask you should have a clean sky
extraction, ready for the new sky. If you miss something you can always
go back to the mask and detail it further.
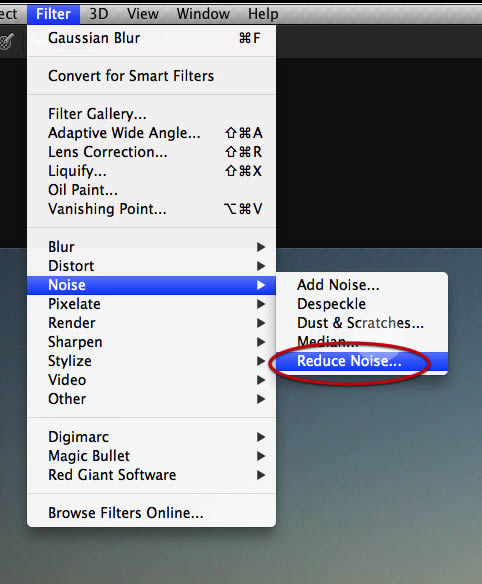
I selected this image for our new sky, yet you can choose some other
sky. As its usual with low sun images there is always heavy noise and
artifacts in them, so we will use the reduce noise tool to get rid of
all this.
Adjust the dialog settings as shown here to get full noise reduction.
Bring the image on to our main project.
Scale it wide and flat as shown here.
Now let’s make a new layer on top of the sky layer.
Now let’s grab the brush tool again and select a big soft tip.
Sample a very light color from the landscape horizon, and paint in all across so we blend the new sky with the landscape.
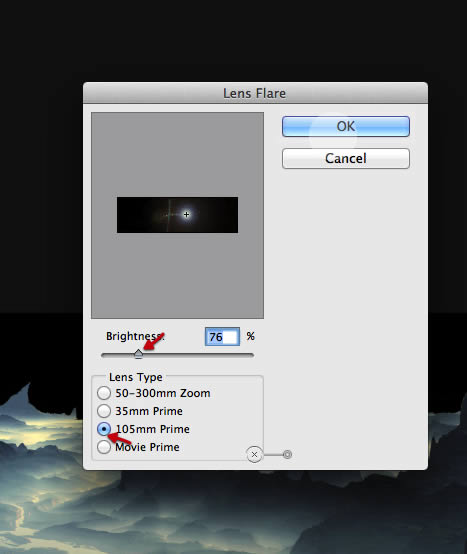
Now let’s create even another layer on top of the sky and fill it in with black.
Use the lens flare filter as shown here and set the layer mode to linear dodge.
Let’s scale and rotate the flare a bit as shown here..
With the soft brush tip and the eraser tool just erase a bit of the sharp edge from the top right.
On top of the horizon and sky layer we need a color balance layer, and adjust the levels as shown below.
Over the flare layer we also need a color balance layer, yet this
time clipped so it only affects the layer below, and we can now bring
the colors of it to match our sky.
Adjust the color balance as shown here so the warmth and balance matches as seen below
To get rid of the obvious lens artifacts we can apply Gaussian blur again.
Let’s now go back to the layer where we sketched our overhang peaks.
Let’s select the brush tool and enable transfer and pen pressure on the brush palette.
Let’s use the same chalk brush again and make it only 2px.
It’s now time to make our sketched shapes shown here on to rocks that
match the detail of the rest of the landscape. The most important step
to start with is to sample color correctly from highlights and shadows
that match the landscape close by.
Then with this very small brush and taking advantage of the settings
we have on the brush palette we add detail a bit more to our peaks as
shown here, yet keep in mind that we will add even more detail later on,
but I like to add my detail in increasing stages, so there is always a
chance to modify something without the need to waste any work.
If you arrive at a section that is way to rough, it is always better
at this stage to refine the border a bit with the eraser tool..
Just quickly go around the edge making it more defined.
And next once again sample color from the plate for both highlights
and shadows. Then let your eye guide you to our new increased level of
detail as shown below.
You have to pay close attention to sections where there is influence
from haze and fog as shown here where you need to match your color pick
for both depth and altitude to match.
...and that's the end of the preview!


No comments:
Post a Comment