Preview of Final Results
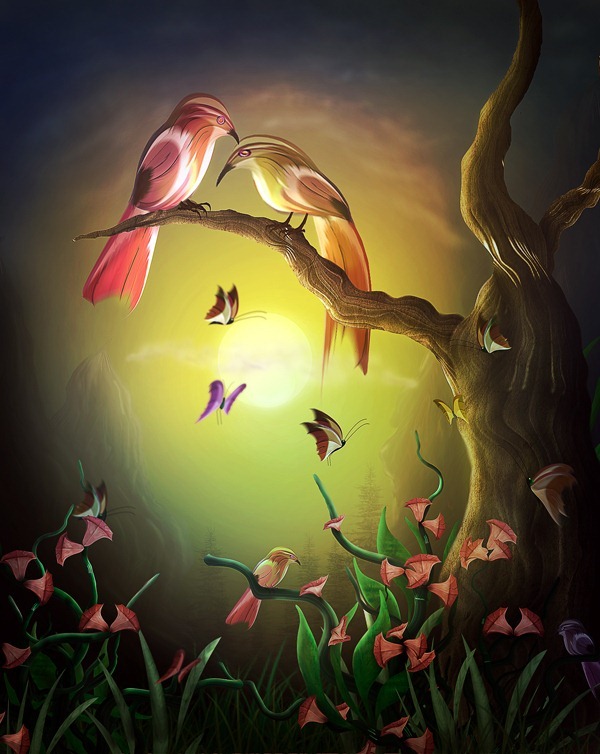
Download the PSD
Bird Painting.zip | 18.09 MBDownload
Pair of Birds Painting Photoshop Tutorial
Tutorial Resources
- Umbrella – Pxleyes
- Trees and Bushes Brushes – falln brushes, Deviantart
- Texture – sxc.hu
Step 1 (Preparing Stock)
Firstly, open the picture provided :
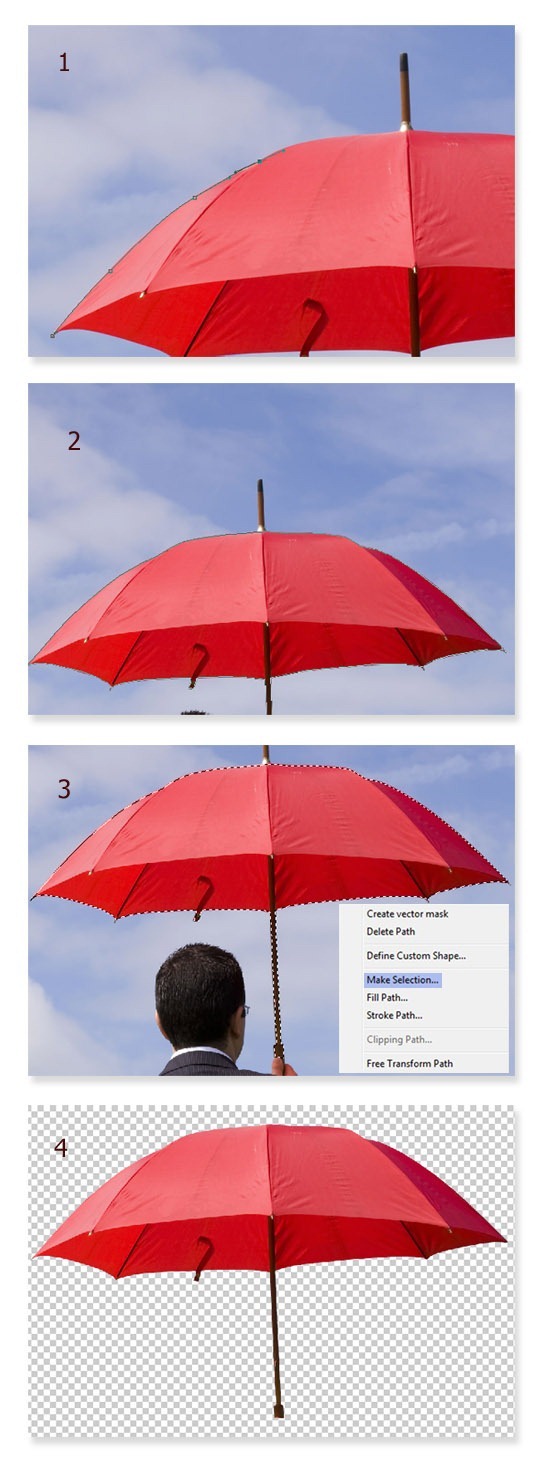
Next, activate the pen tool in the tool panel. We will crop the umbrella from the picture. All we have to do is click on the edge of the umbrella to make a starting point anchor. Trace the edges of the umbrella with the pen tool by keeping on clicking until the path is closed. When the path is closed, right click on it to show path command option box. Choose make path selection to change the path into selection. Hit Shift+Ctrl+I to inverse the selection and then hit Del to clean the background.
Step 2 (Creating Flowers)
Now we have the umbrella with which we will create some shapes needed. In this step we will create flowers. Duplicate the umbrella. Hit Ctrl+T to activate free transform tool which is indicated by small squares as transforming points around the selected picture. Now right click on the duplicated umbrella to show transform command option window and choose Warp. Let’s tweak the umbrella to alter the shape of it by clicking and dragging to the directions needed to find desired shape. Duplicate the umbrella again and do the similar step to find the other desired shapes. See the illustration picture to guide us what to do in this step.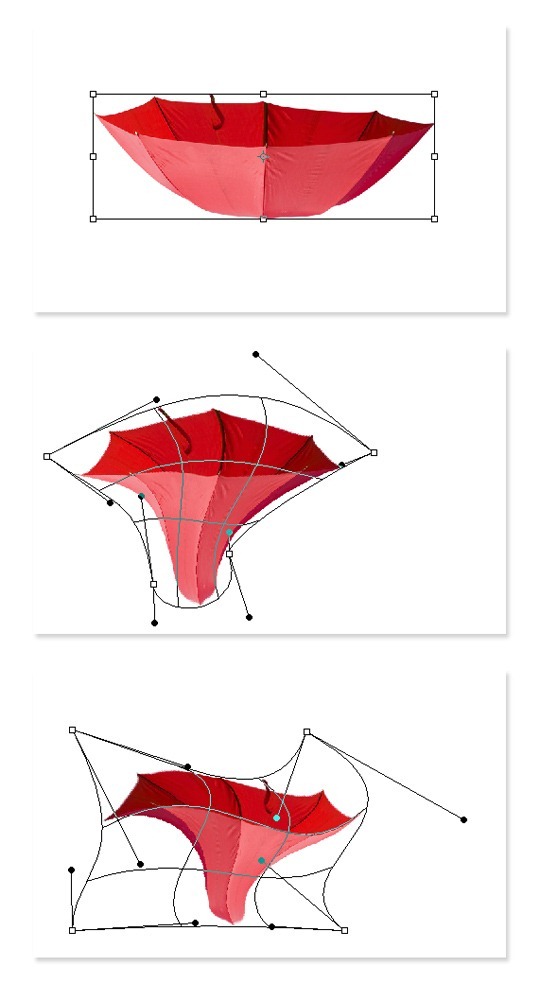
After finding the flower looking like shape, we need to give it some shadow and highlight. To do this, we just use the dodge tool. Please see the illustration picture to know the setting of the dodge tool. Dodge some parts of the shape to define the highlight.
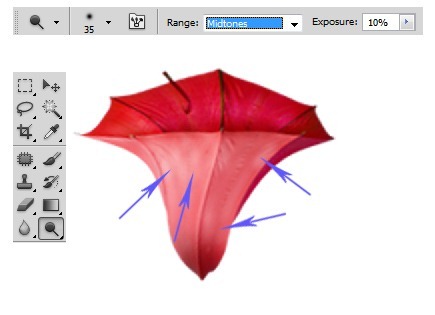
Now switch to burn tool to give some shadow to the shape. Please see the illustration picture :
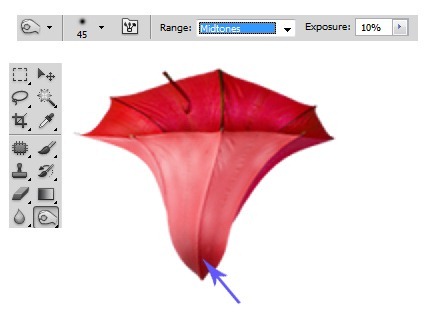
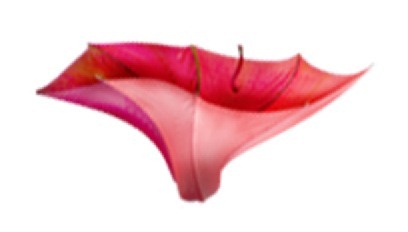
Do similar ways as in previous steps to give shadow and highlight to the other shape :
Step 3 (Creating Twigs)
From this step on, we will create twigs for the flowers. To achieve this, firstly go to the cropped umbrella again and cut out the stick of it. Duplicate the cut out two times and then merge them into a single layer. Duplicate this new single layer as many times as needed.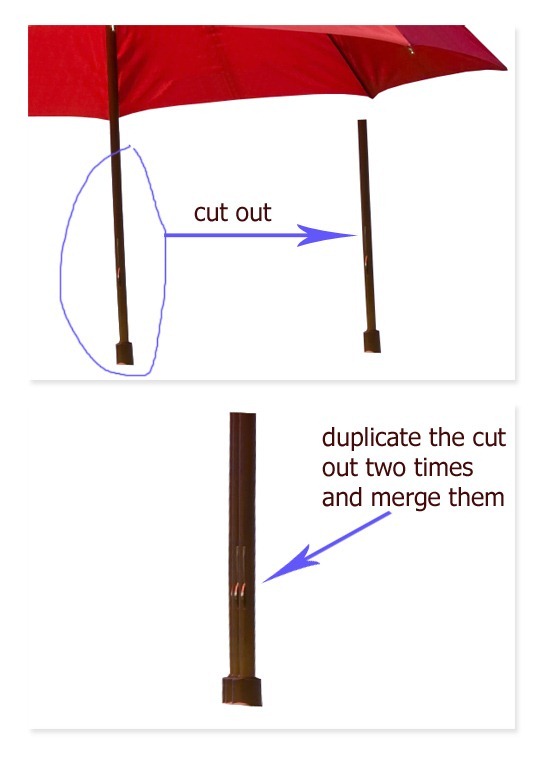
Select one of the duplications and then go to filter > liquify. Choose forward warp tool and tweak the shape of picture:
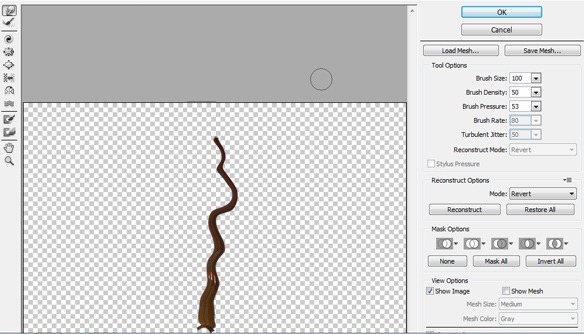
Next, do similar ways to the other duplication pictures. Try to vary the shapes we are creating in order not to look uniform. Once we have created the shapes, arrange them in such position that they look like twigs of a tree. Then alter the color of the twigs by giving them an adjustment layer: hue/saturation.

Step 4 (Creating Birds)
In this step on, we will still play around with warping to create a bird out of the umbrella. What we should do is duplicate again the umbrella. Warp the shape of the duplicated umbrella. Then, give it motion blur. Just name this layer blur shape.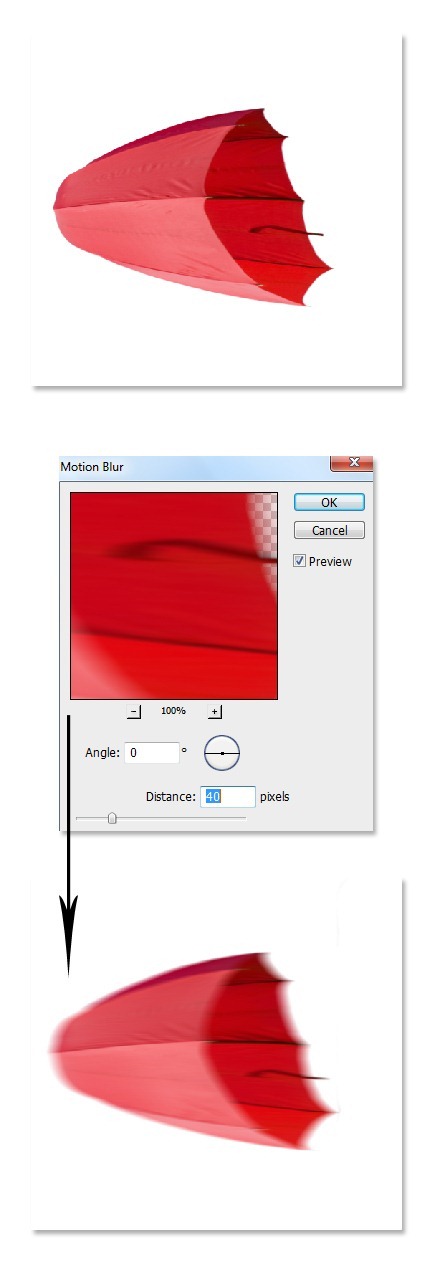
Duplicate the blur shape layer. With the duplication layer selected, hit again Ctrl+T to activate free transform tool. Choose warp and tweak it to alter its shape into a wing of a bird.
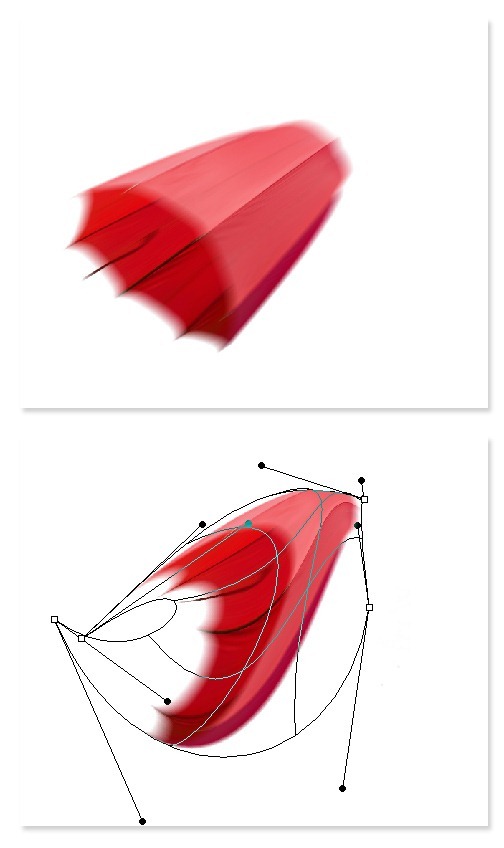
Duplicate again the blur layer as many times as needed. Keep on messing around with warping each duplication layer to create different shapes. Here is the result I created:

Cut out a part of the umbrella stick. Alter the shape of the cut out like the one I did. This shape is supposed to be the body of the bird.
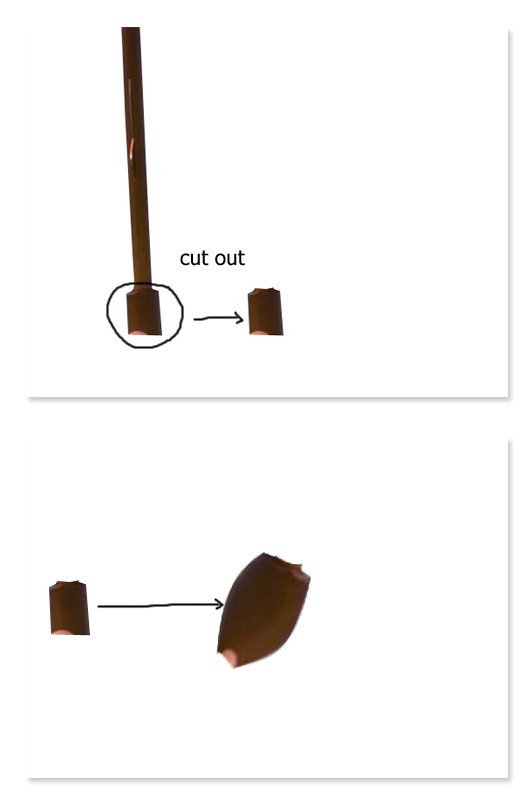
Now we have complete parts of a bird. What we are doing now is joining the parts into one single bird’s body.
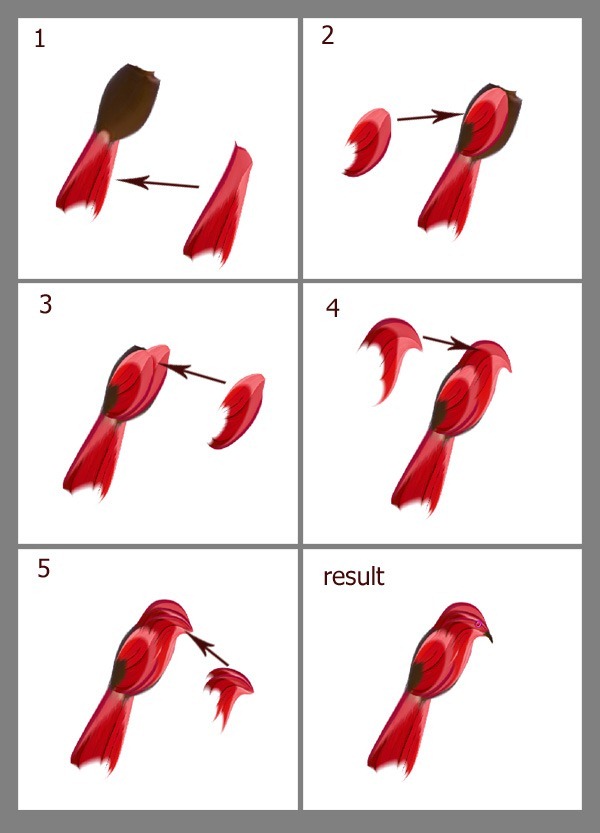
Step 5 (Creating Butterflies)
With similar ways as the ones we do in creating the bird, we can create the other creature out of the same umbrella picture provided. This is the wing of butterfly I created: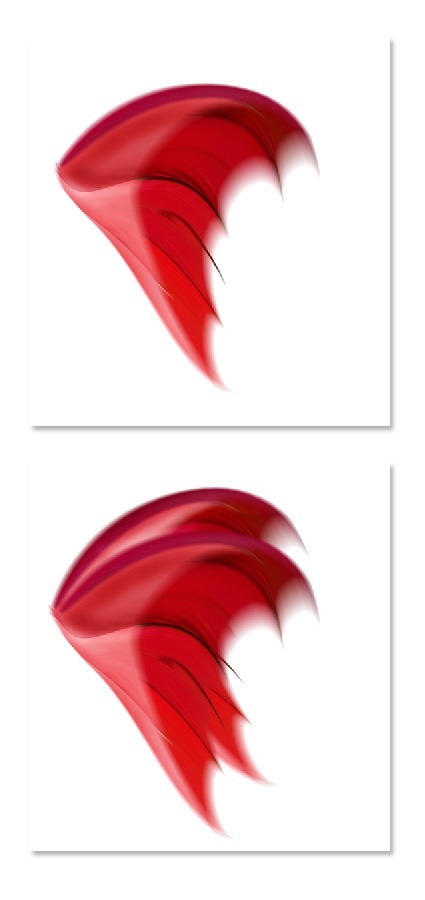
We need to create the body of the butterfly. Create a new later (Shift+Ctrl+N). on this new layer, paint the body with dark green color. To define the shadow and highlight of the body, apply dodge and burn tool to it. Use the setting of the tool as the ones we use in creating flowers.:

Now add the wings to the body:
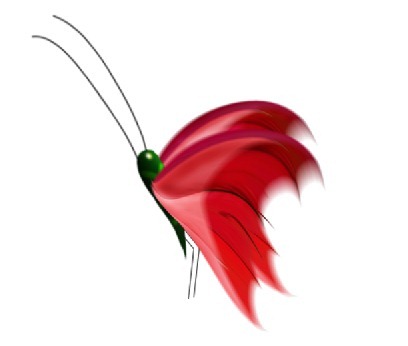
Here is the other butterfly I created:
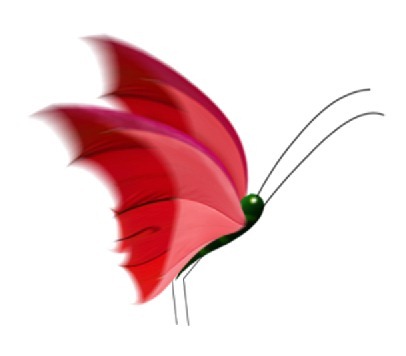
Step 6 (Creating Hills)
In this step on, we will create hills for the background of the picture. Go again to the cropped umbrella. Cut out the stick. Then, duplicate it some times as needed. Merge the duplications into a single shape.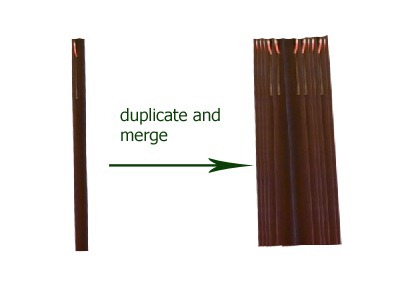
With the new single layer selected, go again to filter > liquify to alter and tweak the shape of it into one that looks like a hill.
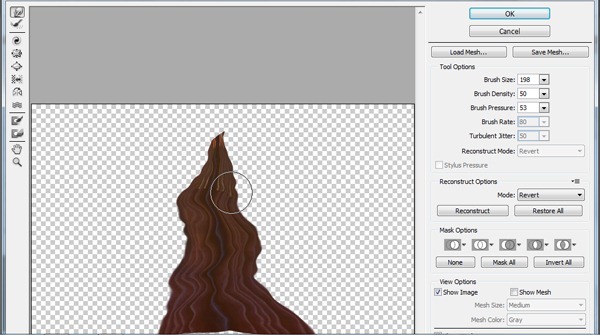
Next, let’s enchant the look of the hill by smudging it. Activate the smudge tool. Use a very soft round brush for the smudge at 70-80% strength. Smudge the lines of the shape. Try to vary the size of the brush at between 8-10 pixel.
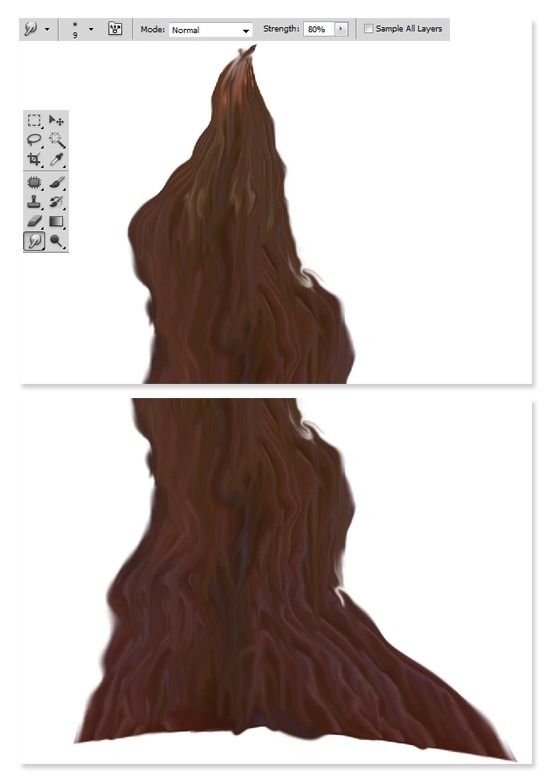
Duplicate the hill layer as many as needed. Scale the size of each duplication into the one needed and then arrange them to create a single hill.
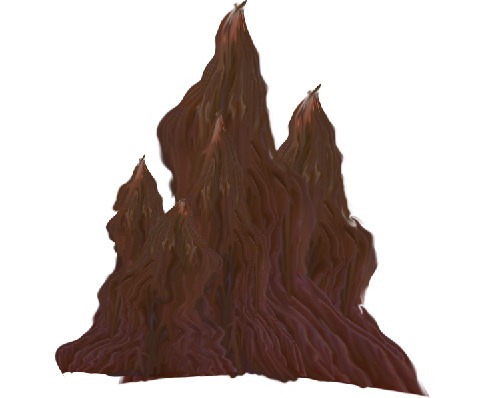
Step 7 (Dead Tree)
The last object we will prepare for the scene is a tree. We still use the cropped umbrella to create the tree. After doing duplicating the stick of it, merging the duplication and then altering the shape with liquify tool, I created these shapes which are supposed to be the stem and branch of the tree.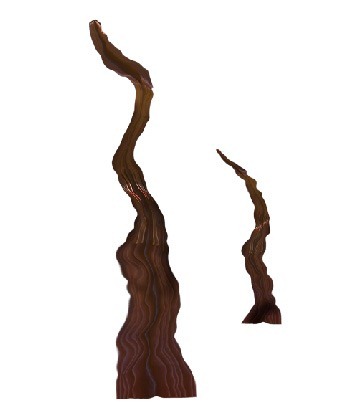
Now, arrange the shapes into a single tree. First, duplicate the stem and place the duplication behind the original one. Then, add the branch to the stem. After that, duplicate the branch and scale the duplication down a bit. Place it to the right side of the stem. See the result shown in the illustration picture.

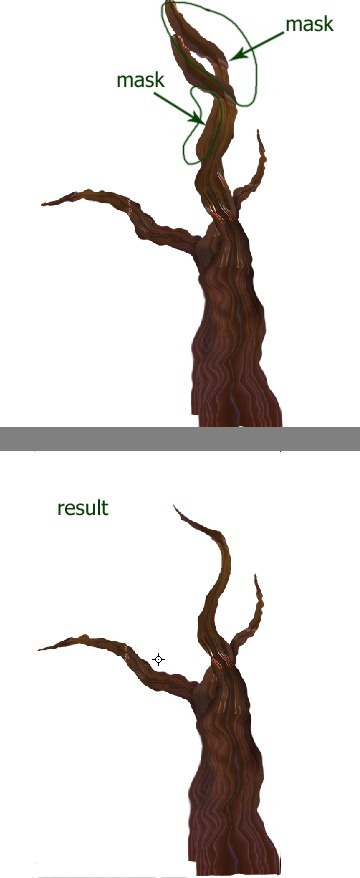
I decided to hide some parts in the tree by masking them to get the result like I did in the illustration picture:
Step 8 (Creating Background)
We have created some objects needed to fill the composition of the photo manipulation we are going to create. Start with creating a new document (Ctrl+N) with the following size: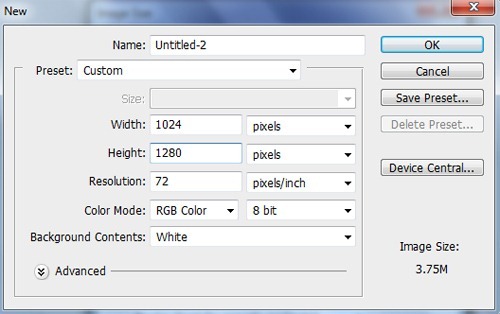
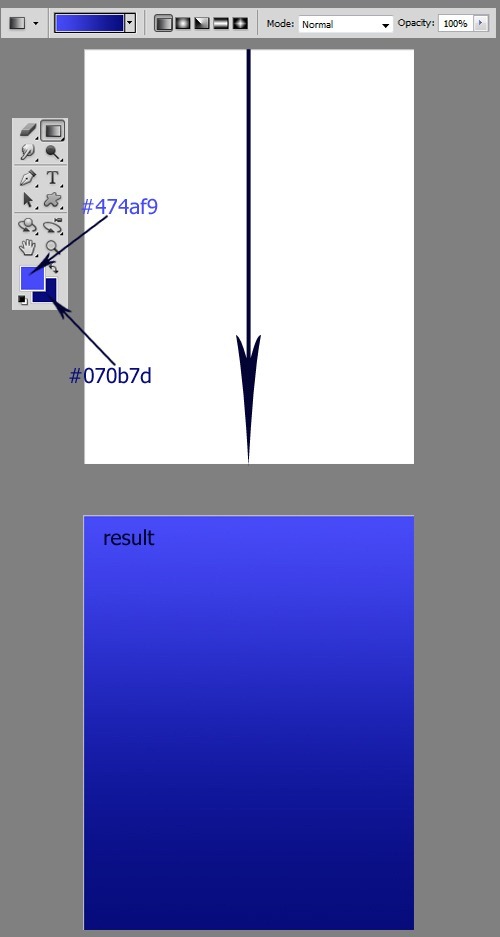
Activate gradient tool and set the gradient to linear gradient. Fill the new document with gradient of #474af9 and #070b7d by clicking and dragging the gradient tool from the top down to bottom.
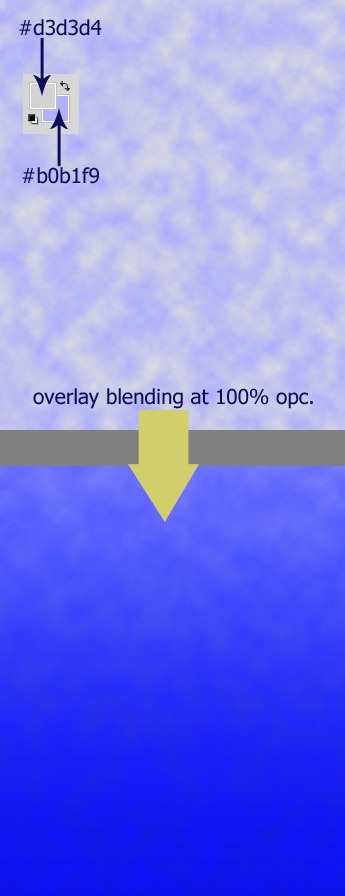
Now create a new layer (Shift+Ctrl+N) above the background. Make sure to set the color of foreground to #d3d3d4 and #b0b1f9 for the background. Go to filter > render > cloud. This will fill the layer with cloud. I named this layer cloud. Set the blending of this layer to overlay at 100% opacity.
Create another new layer. Fill this layer with linear gradient of #faea94 and #fcb406. I named this layer gradient. Set this layer’s blending to multiply at 100% opacity.

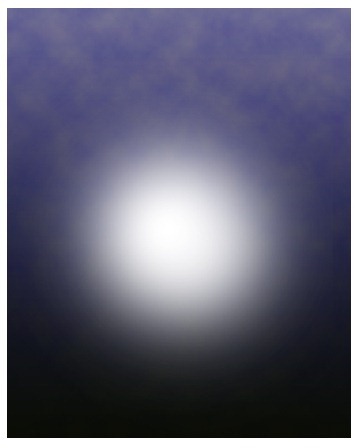
Create again a new layer. Take brush tool in the tool panel. Set the brush to normal mode at 100% opacity. Choose a very soft round brush and then, with white color set to foreground, click the brush on the new layer to create a white soft circle on it. I named this layer white. Keep it at 100% normal blending.
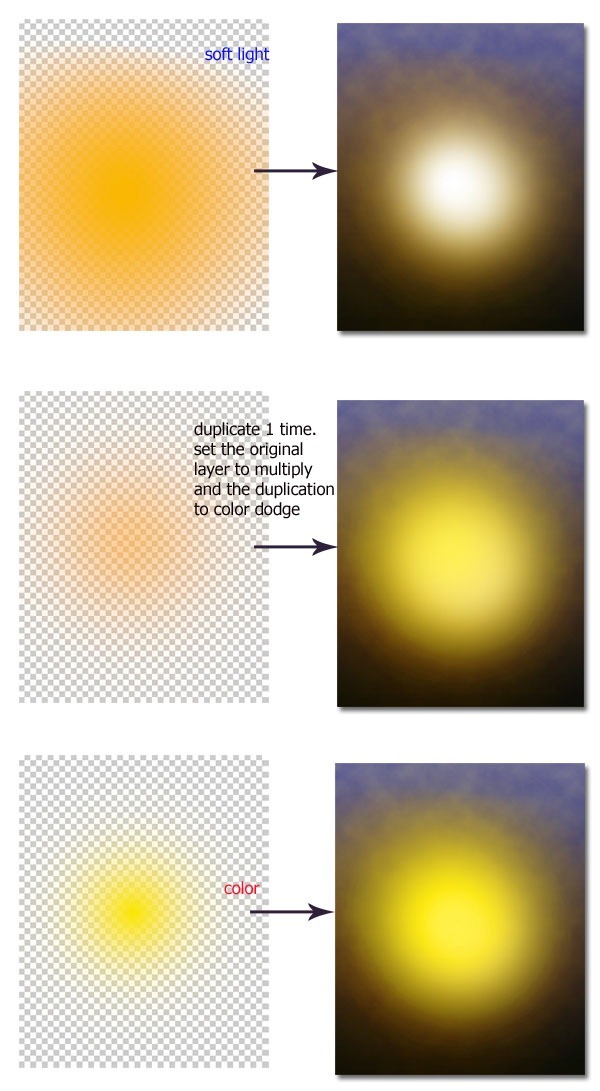
In this step we will proceed in setting color of the background. Firstly, create another new layer on which we will paint color of # fab730. Use a very soft round brush for this step. I named this layer orange. Set it to soft light at 100% opacity. Next, on another new layer, paint another color of #fcb305. Use a very soft round brush set to 40-50% opacity. I named this layer soft orange. Set this soft orange layer to multiply at 100% opacity. Duplicate it one time and set the duplication layer to color dodge blending at 100% opacity. Finally, create another new layer on which we will also paint another color of light yellow (#fae603). I named this layer yellow. Set this layer to color blending at 100% opacity.
Step 9 (Adding Moon)
We will create moon on the scene. To do this, create again a new layer. With white color, paint a circle almost in the mid of the scene. Set this layer to normal at 25% opacity. I named this layer moon.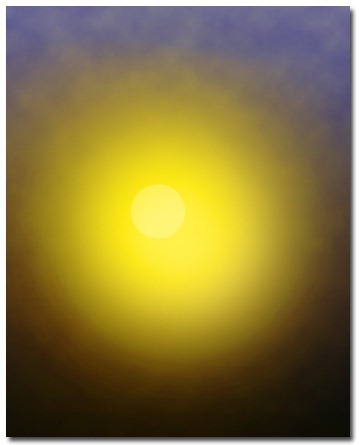
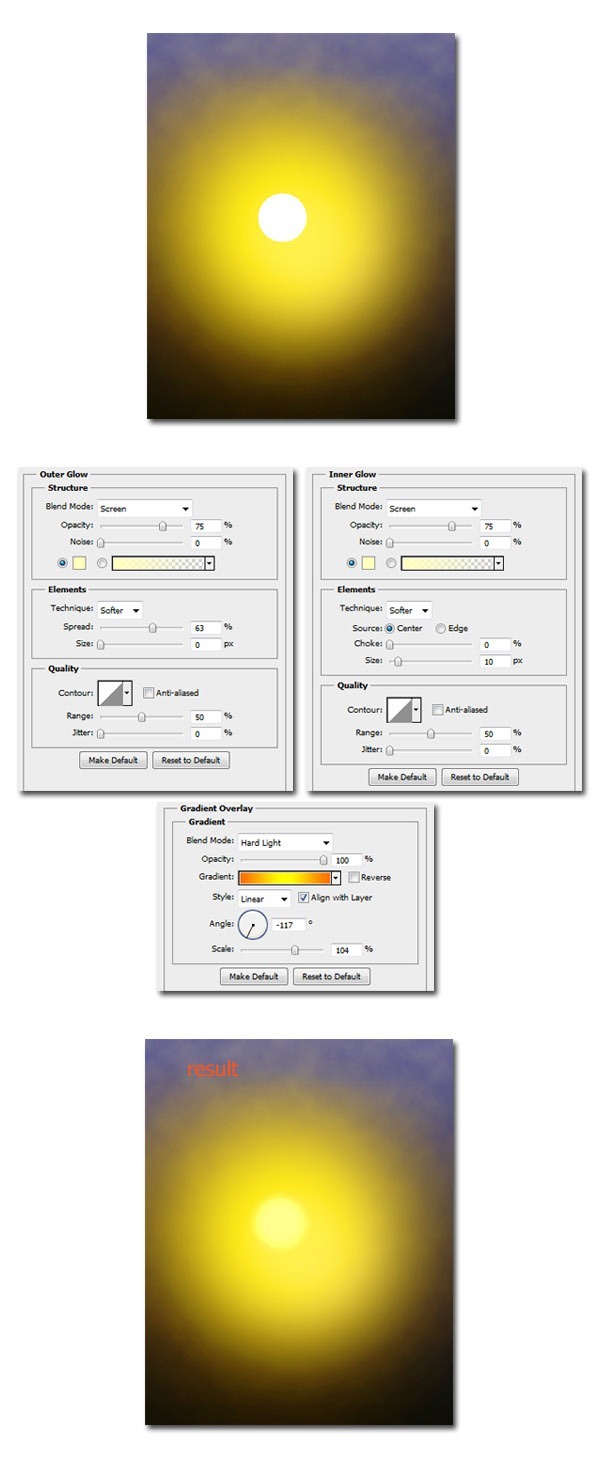
Duplicate the moon layer. Then go to layer > layer style. Please see the illustration picture for setting of layer styles used. Then, set this layer to normal. Reduce its opacity to 52%.
Step 10
Finally, we will give an adjustment layer to the scene. Go to layer > new adjustment layer > color balance.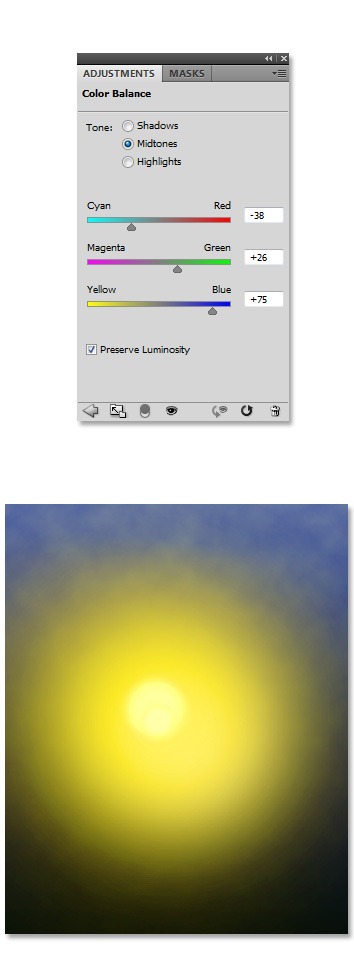
Step 11
After creating the background, we will add the objects we have created in previous steps. Firstly, we add the hill. Scale the hill to fit the size we want. Place it to fill the composition on the right. Finally set it to normal at 19% opacity.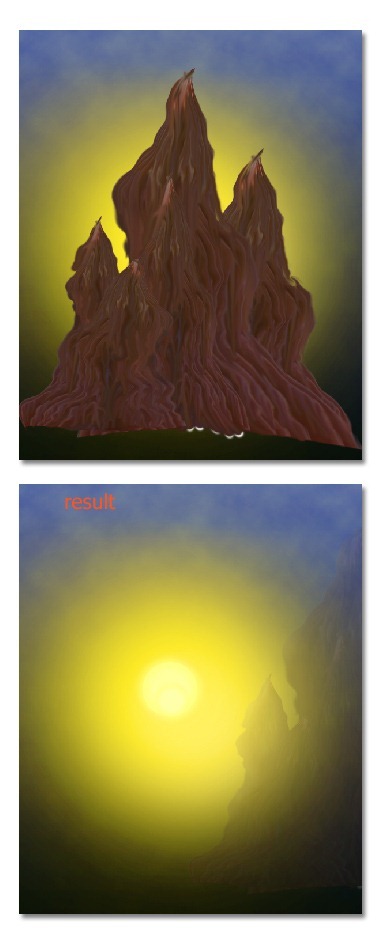
Step 12
Duplicate the hill and place the duplication on the left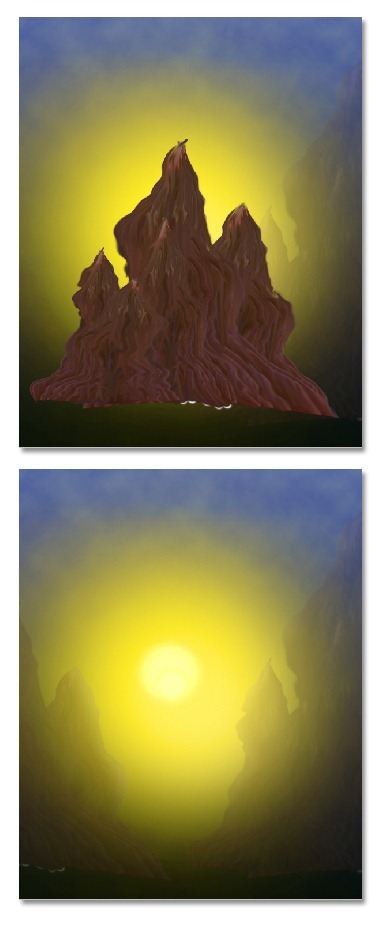
Step 13
Now add some trees on the canvas. Use the given tree brush to paint them.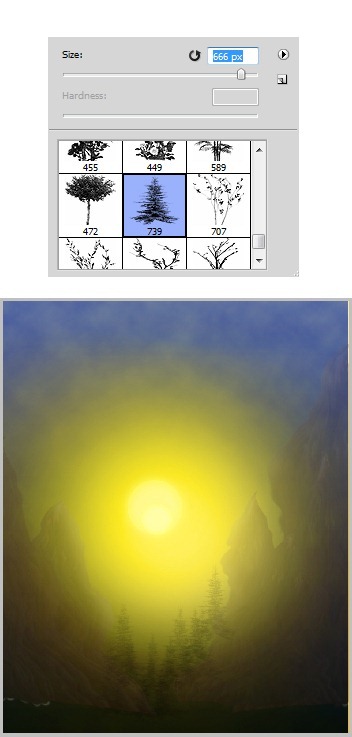
Step 14
Add another object to the canvas: tree. Give more highlight to some parts of the tree. Use dodge tool to do this step. Please refer back to previous steps for the setting of the dodge tool.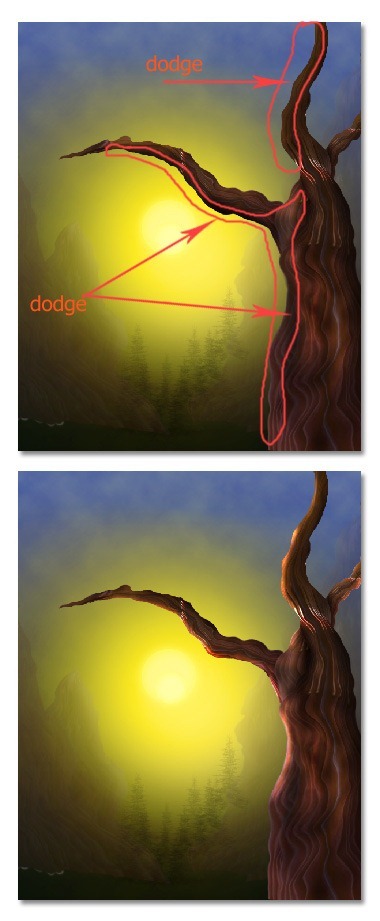
Step 15
Finally, alter the color of the tree by applying a new adjustment layer to it. I gave it hue/saturation. Give this layer clipping mask.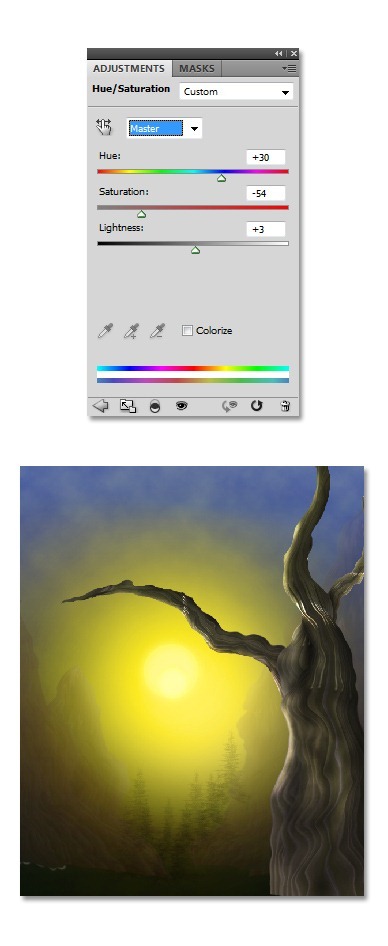
Step 16
Next, open the texture image. Place this texture layer above the tree and hue/saturation layer. Give also this texture layer a clipping mask. Finally, set it to overlay at 100% opacity.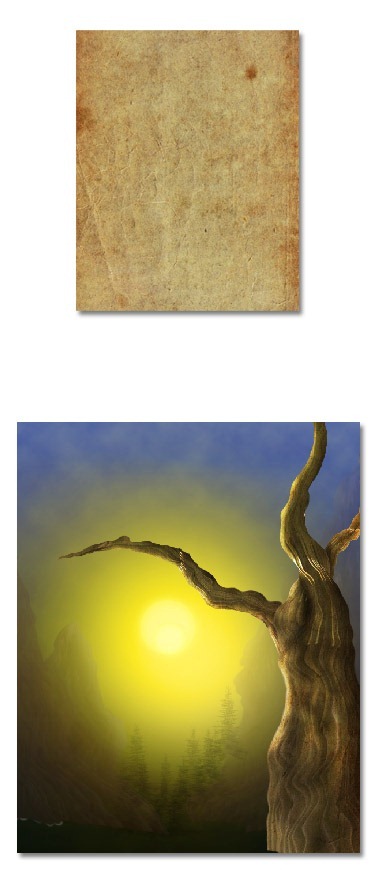
Step 17
Create a new layer under the tree layer. Take brush tool and choose default grass brush to paint some brush on this new layer. See the illustration picture for our inspiration: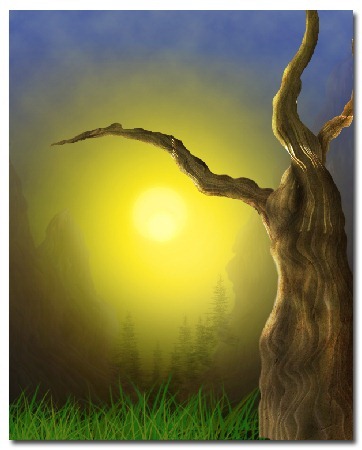
Step 18
Add the bird to scene. Scale the size of it to fit the composition.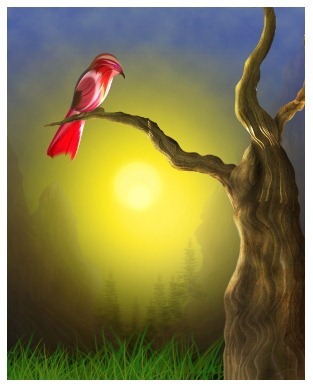
Step 19
Duplicate the bird. Tweak the duplication bird by wrapping a bit in order not to look uniform with the original one. Alter the color of the duplication by applying hue/saturation on it.
Step 20
Now add the twigs to the canvas. Scale the size and arrange its position to fit the composition of the image. Give some highlight to some parts of the twigs. Use dodge tool for this purpose.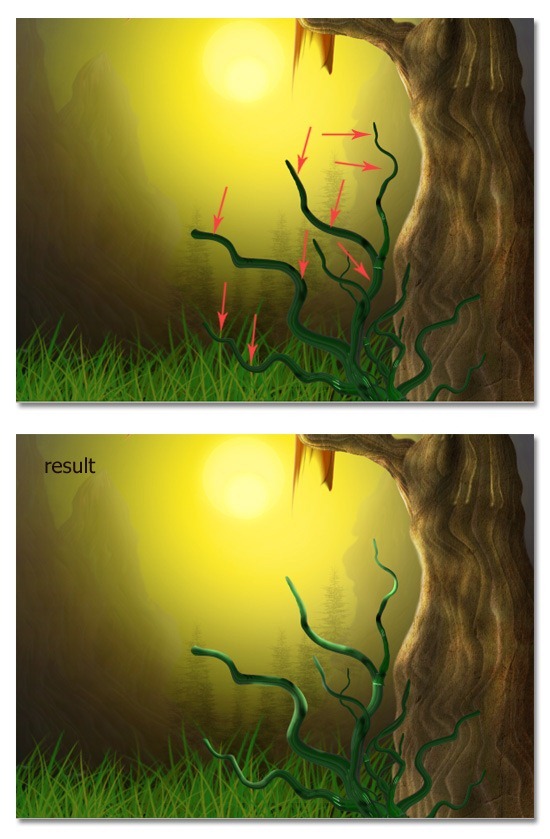
Step 21
Add more twigs. Do the same thing as in step 43 for this step.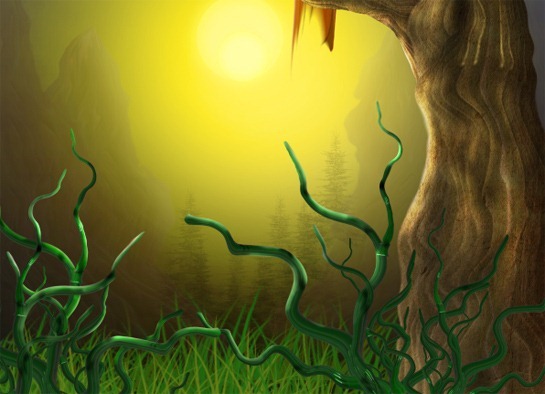
Step 22
After the addition of the twigs, proceed to paint some leaves for them. Go to costume shape tool and choose the leaf shape. With dark green color paint the shape on a new layer. Then, use dodge and burn tool to define the shadow and highlight on the leaf.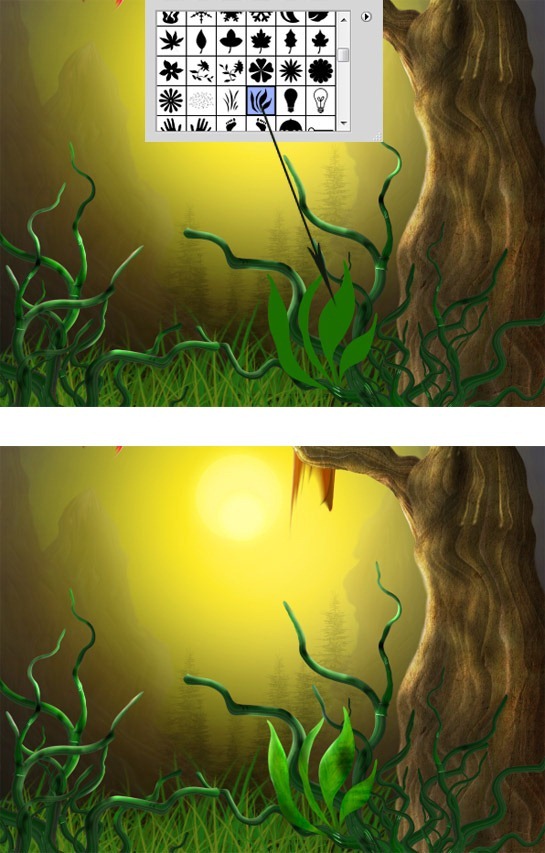
Step 23
Add more leaves.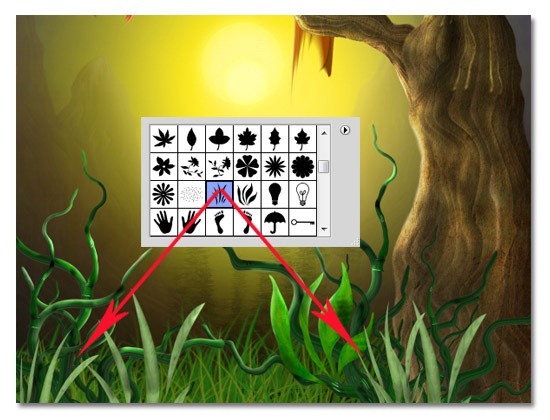
Step 24
Now add the flowers to the scene.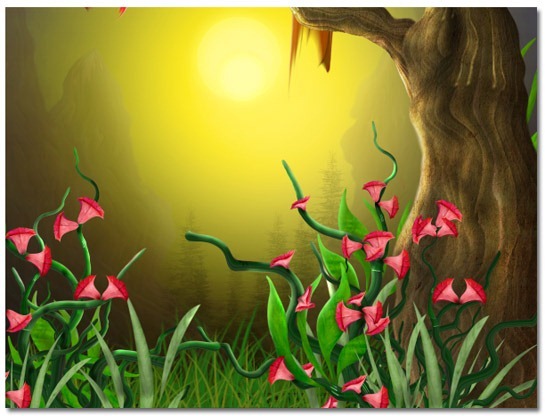
Step 25
To complete the composition, add butterflies and smaller birds. Try to alter the color of the butterflies and birds by applying hue/saturation. Choose any color you desire for them. For our inspiration, I created the result like the one illustrated below: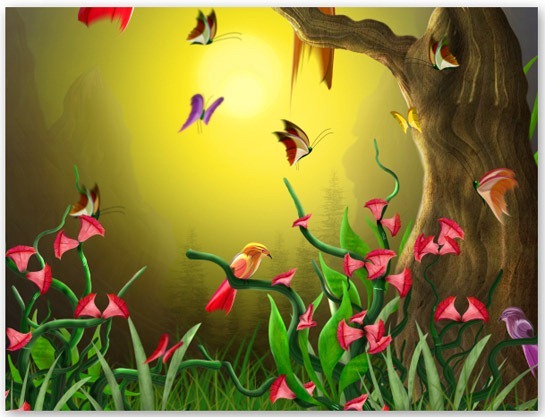
Step 26 (Color Adjustment)
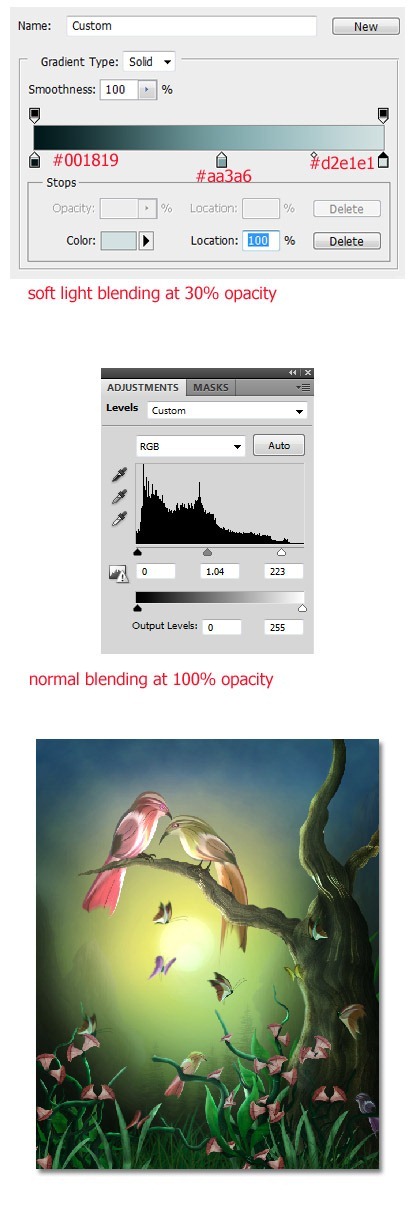
I decided to give more adjustment layers to the scene: two hue/saturations. Please see the illustration picture for the setting of each: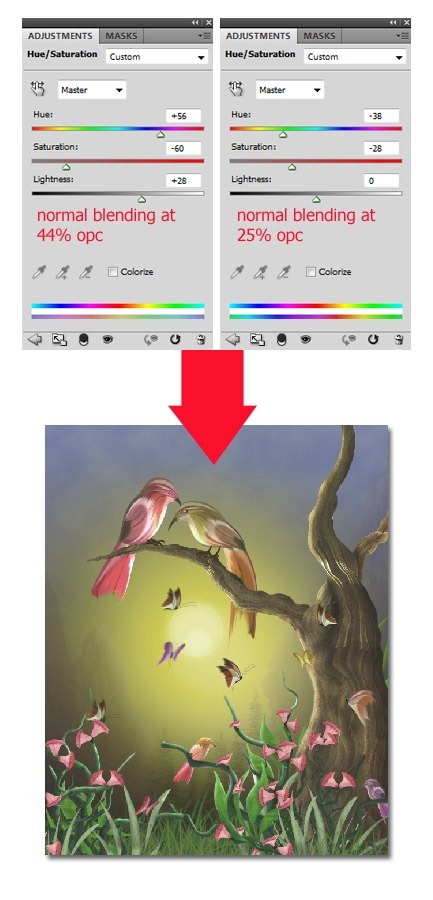
More adjustment layers, firstly, we will give level. Mask some part of this level adjustment layer and set it to normal at 100% opacity. Duplicate the level layer and set it to 50% normal blending. Finally, I added photo filter and set normal at 100% opacity for this photo filter.

Again, we will add more adjustment layers as shown in the illustration picture below:
Step 27 (Adding Cloud)
Hit Shift+Ctrl+Alt+E to stamp all visible layers to create a new single layer. Then, go to filter > other > high pass. Set 2% for its radius. I named this layer high pass. Take brush tool, set it to low opacity about 10-12%. With white color, paint some cloud and lines on the hills. Finally, set this layer to overlay at 100% opacity.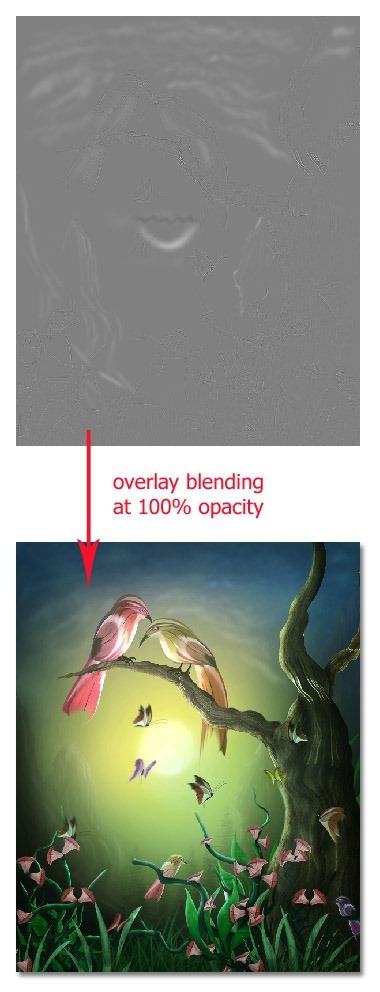
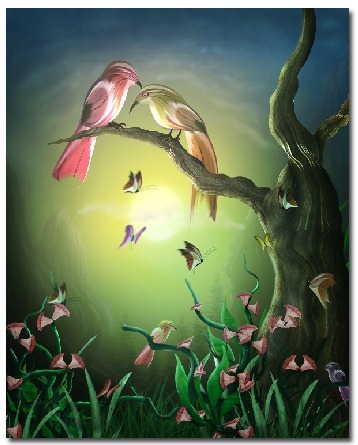
Here is the final composition I created after I add more cloud in front of the moon:
Step 28
Create a new layer. Paint soft black gradation color around the edge of the scene. Use soft brush to do this purpose. Erase some part of the black gradation on the twigs, grass and little bird on the right. Set it to normal and reduce its opacity to 40%.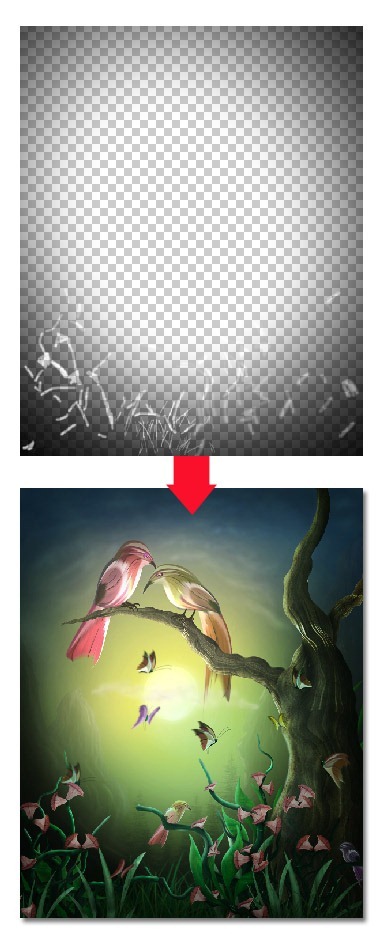
Step 29 (Setting Overal mode)
Again, create another new layer. Paint some color on this new layer as shown in the illustration below. Set this layer to overlay at 100% opacity.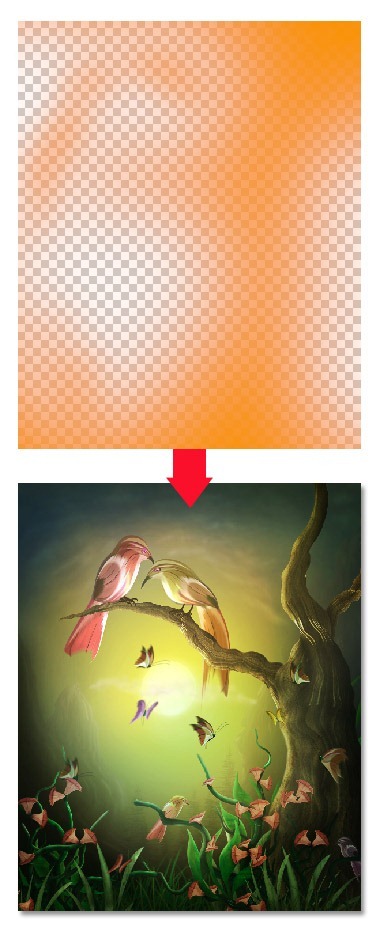
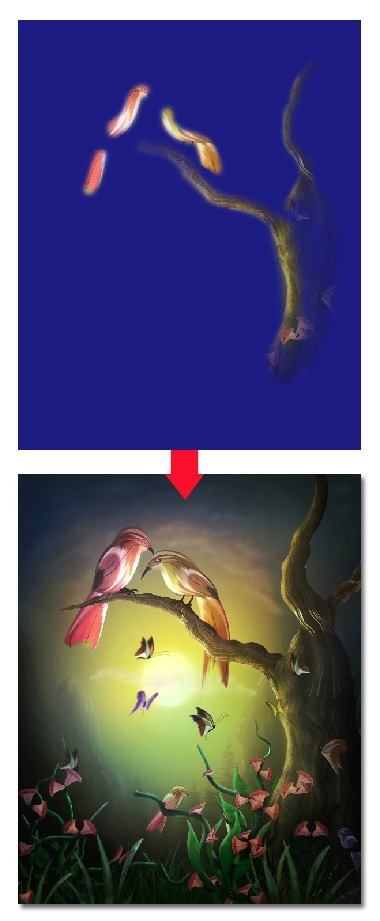
Now create again a new layer. Fill this layer (Shift+F5) with blue. Mask parts of this blue layer on the main birds and edge of the tree. Set this layer to overlay at 40% opacity.
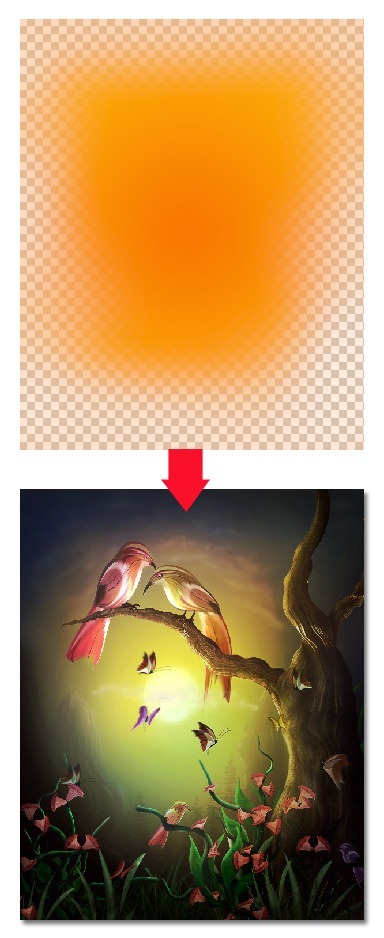
Create one more new layer on which we will paint gradation color of #f87e02. Set this layer to overlay at low opacity (13%). Finally, to finish this work, go to layer > new adjustment layer > levels. Just simply click Auto for the levels.
Final Results
![final result[1] final result[1]](http://photoshoptutorials.ws/images/stories/6c58f168073e_1375F/final-result1.jpg)


No comments:
Post a Comment